Exporting to an Integration
Overview
Exporting to an Integration allows to export your Kindle Highlights to one of our Supported Integrations.
| Integration | URL |
|---|---|
| Dropbox | https://www.dropbox.com |
| Evernote | https://www.evernote.com |
| 印象笔记 (Evernote China) | https://www.yinxiang.com/ |
| Google Drive | https://drive.google.com |
| OneDrive | https://onedrive.live.com |
| OneNote | https://www.onenote.com |
Exporting to an Integration is really easy and can be achieved in a few clicks. This page will show you how to perform your first export. Please refer to the Next Steps section at the end for more advanced formatting options.
Selecting Content to Export
When you perform an export the Kindle Highlights that get exported are determined by what is selected in the left hand navigation menu.
In this example we will choose to export all of our Kindle Highlights.
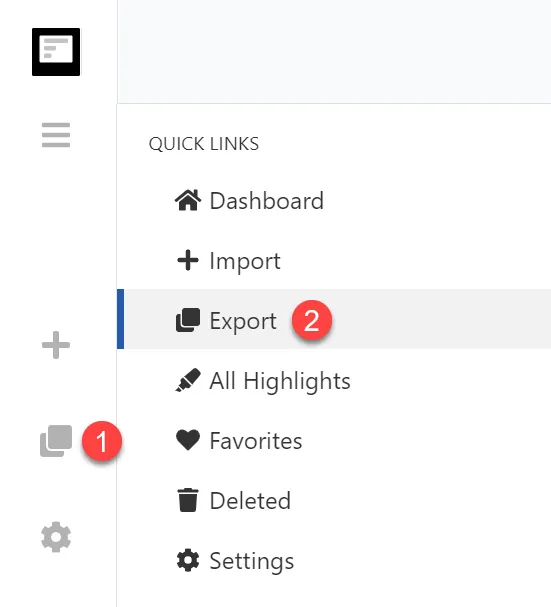
- Click the Export icon in the left toolbar.
- Or, click the Export menu item in the left hand navigation menu.
Clicking either of the options above will take us to the export page with All highlights selected. Alternatively, you can navigate directly to the export page.
You can also select individual books, search results, tag results to export. For more information, see Selecting Content to Export
Connecting to an Integration
Before you can export to an integration you first need to connect to it, you only need to do this once. If you haven't connected to an Integration it will have a Connect banner at the top of it's logo. To connect to an Integration click it's logo.
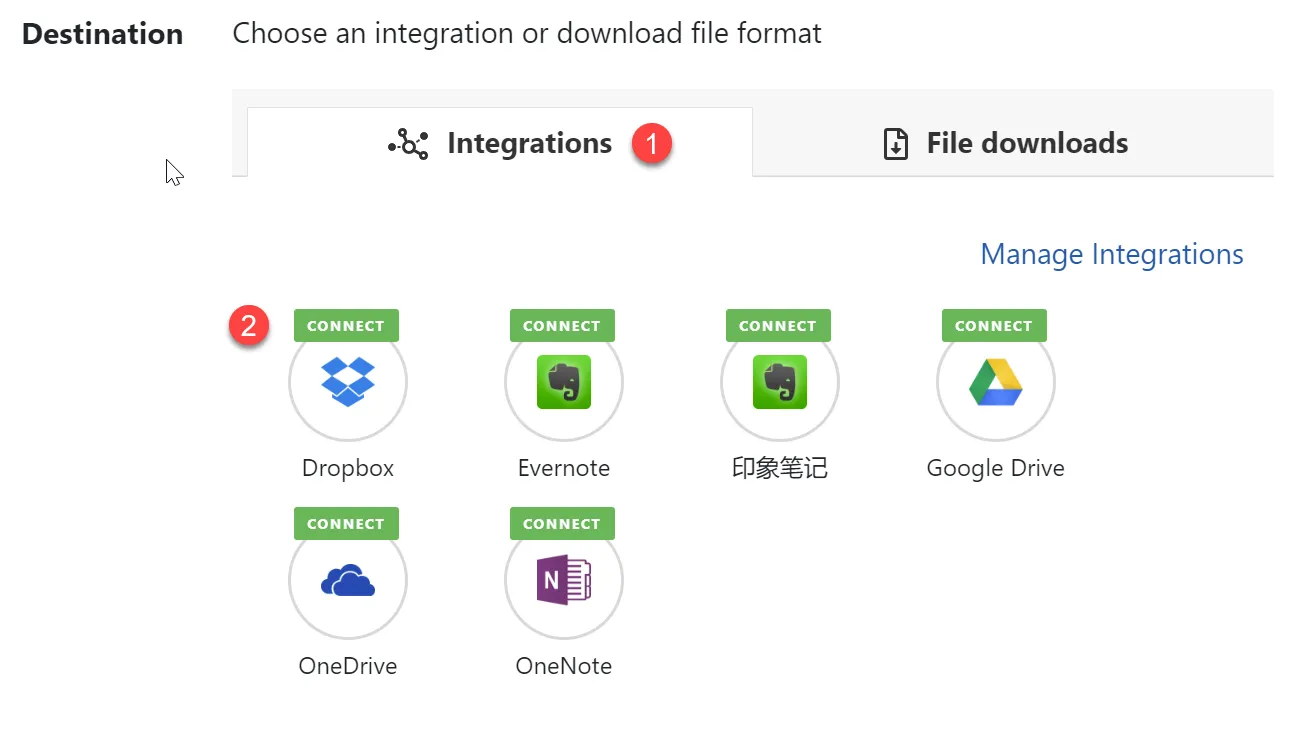
- Ensure you are on the Integrations tab.
- Click the logo of one of the integrations.
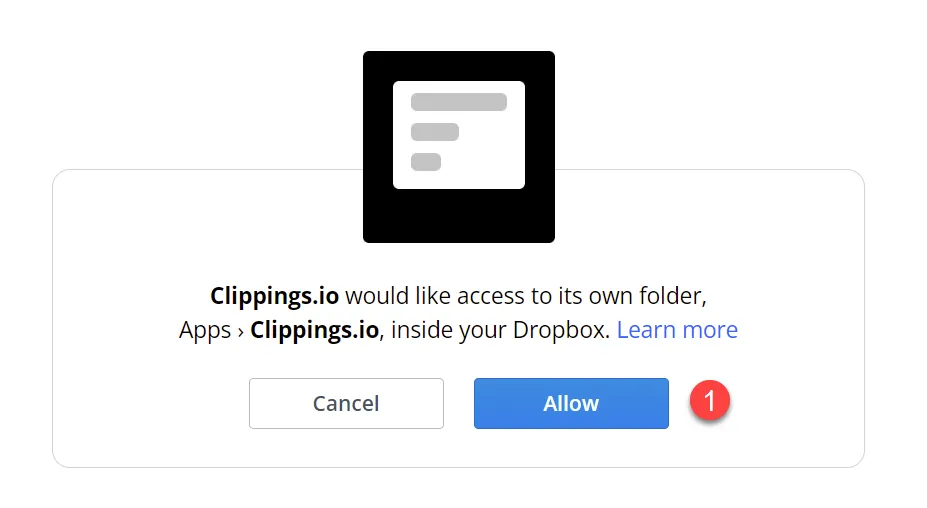
In this example we are connecting to Dropbox. Dropbox will first ask you if you want grant access to Clippings.io. Click the Allow button.
Once you have successfully connected to the Integration you will see a confirmation message. Note that when connect to an integration Auto Export is turned on. You can read more about Auto Export on the Export Options page.
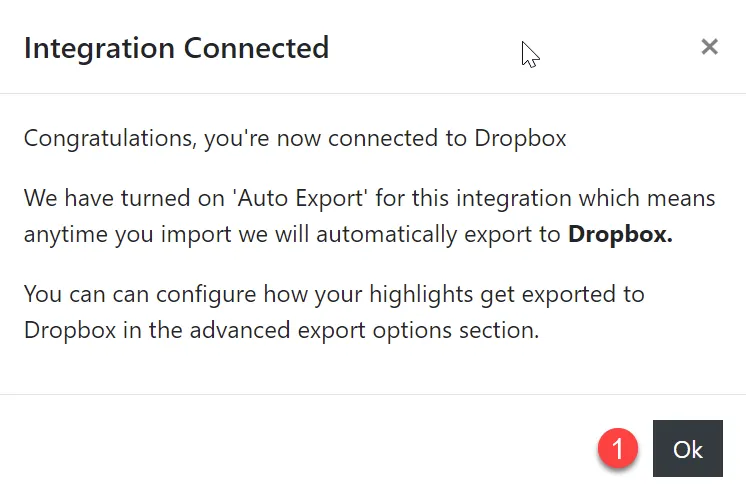
The integration will also now be included in the Connected Integrations section on the Integrations Settings page. You can use this page to manage connections to all of your integrations.
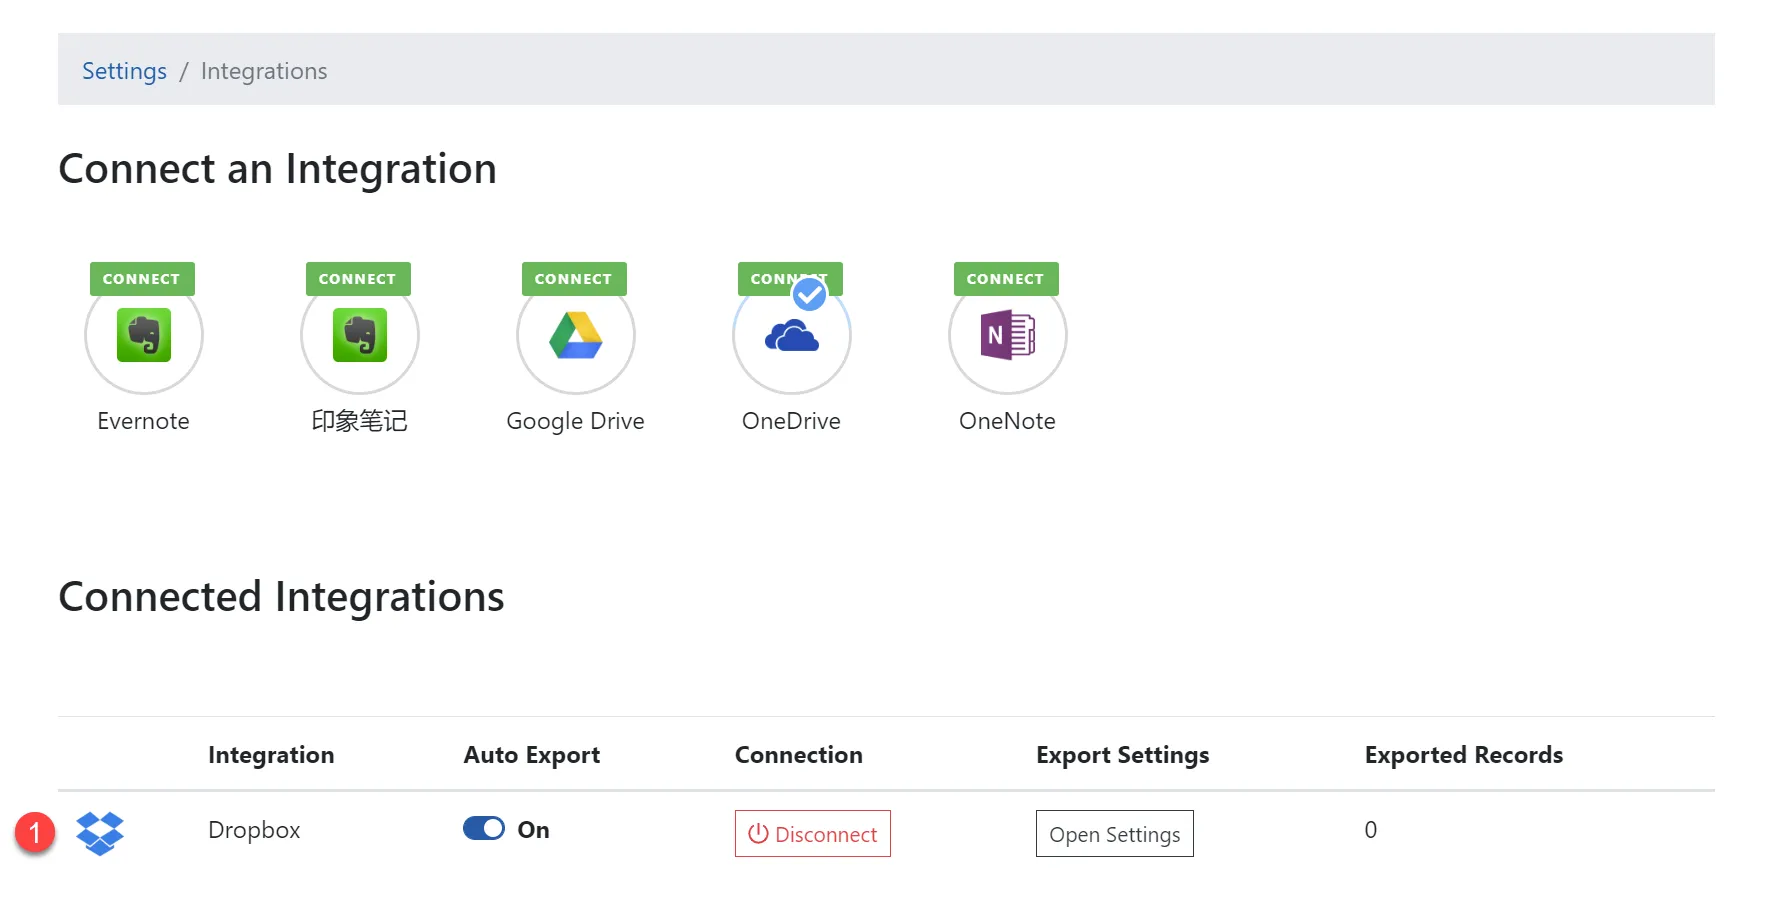
- Dropbox is now included in the Connected Integrations section.
Selecting the Integration
Now that you have connected to an integration you can select it as your export destination.
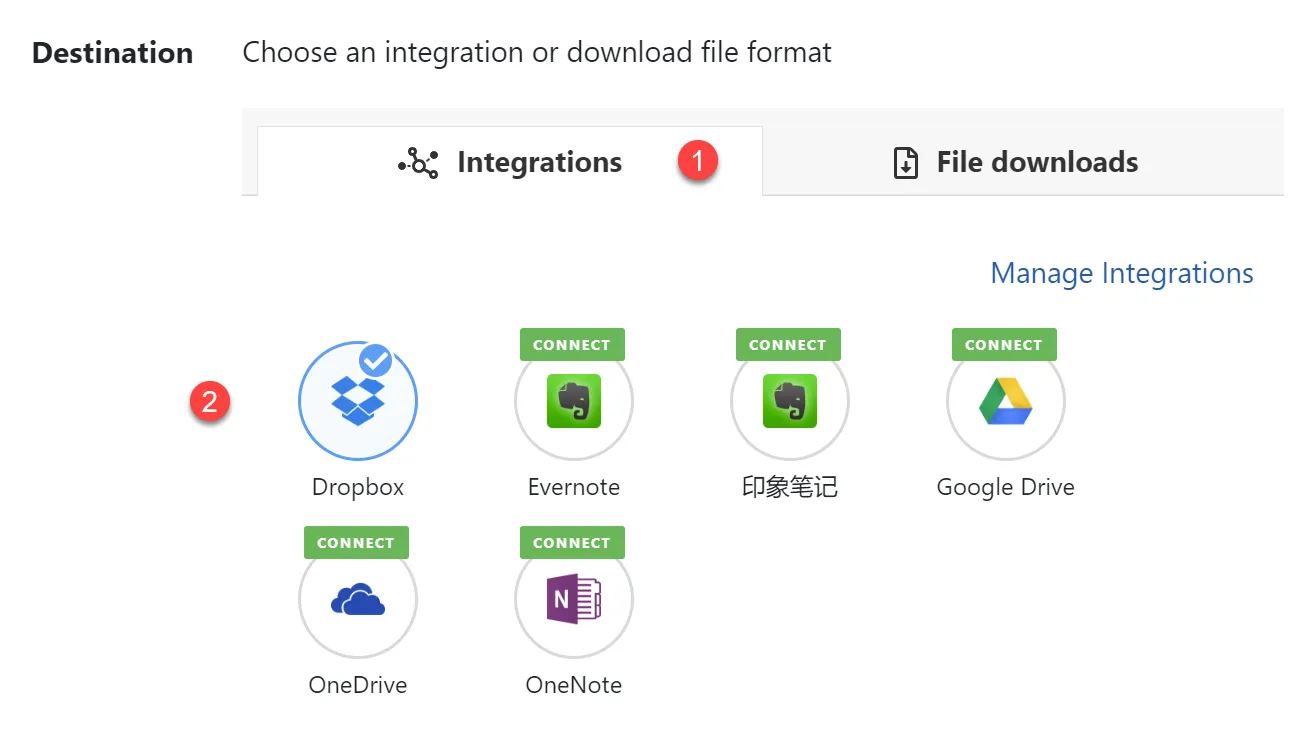
- Ensure you are on the Integrations tab.
- Click the integration to select it. When it is selected it will have a blue tick.
After you have selected an integration will see a summary of the export that you are about to perform. You can also choose options regarding how you would like your export formatted, we will stick with the default settings for now and cover these in the Export Options Guide.
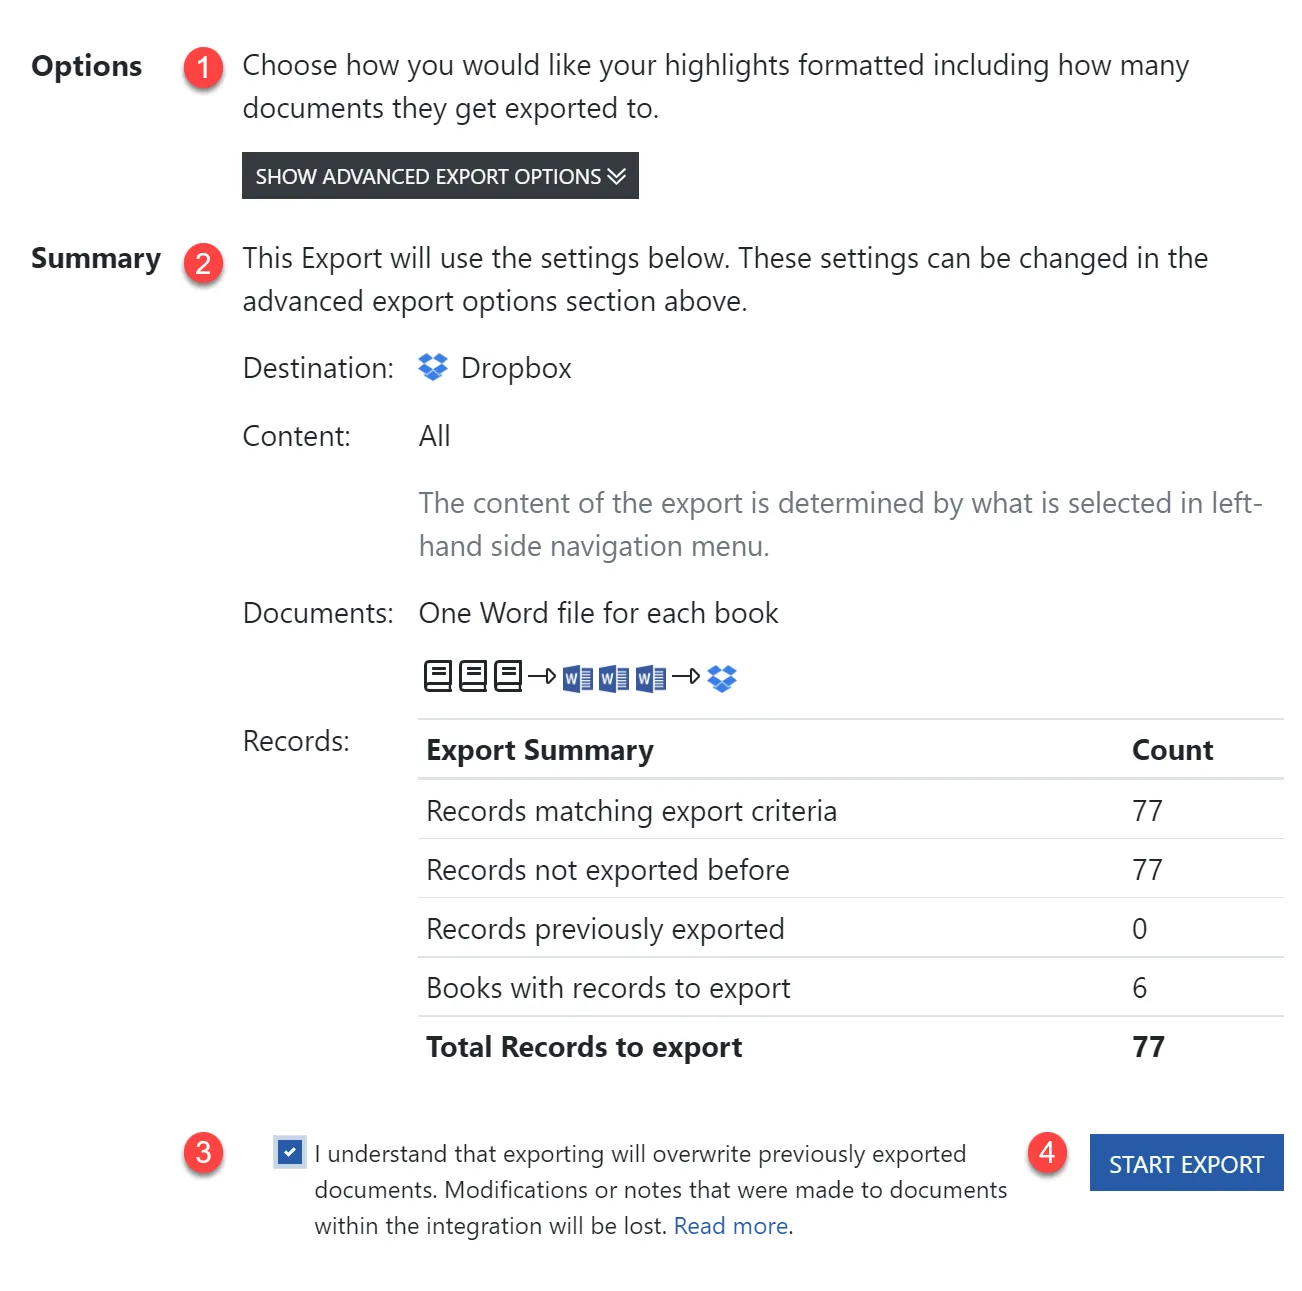
- The Options section allows you define advanced export formatting options. We will leave these as default for now and cover them in the Export Options Guide.
- The Summary section shows you a summary of the export. It covers what content is getting exported, where it is going, and how many books and records are getting exported.
- Accept the overwrite warning before you can commence the export. See the note below.
- Click the Start Export button to commence the export.
If you are exporting lots of Kindle Highlights your first export to an Integration may take a long time. This is because most integrations have rating limiting which dictates how fast Clippings.io can use their import APIs. The great news is your subsequent exports should be really fast as our export algorithm is designed to be efficient and will only export the highlights which have not been exported before.
Export Complete
When the export has completed you will see an export summary.
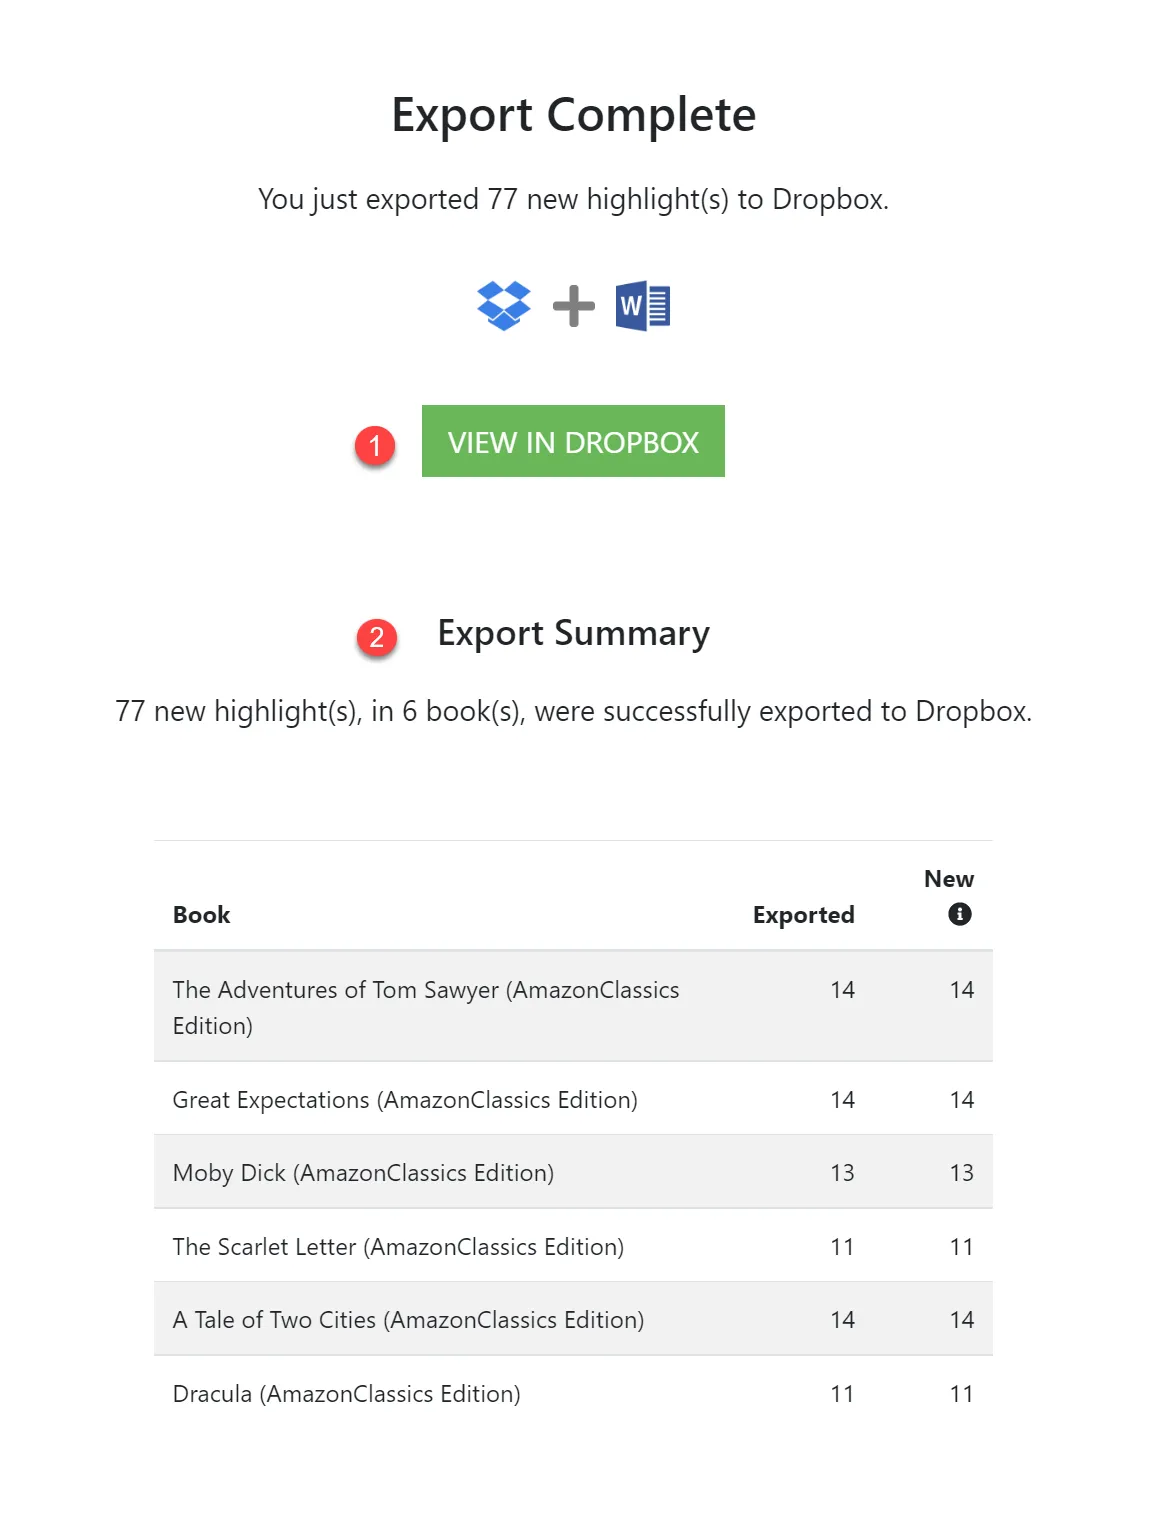
- Open the Integration to see your newly exported Highlights
- The Export Summary details how many highlights were exported.
Next Steps
Congratulations on performing your first export to an Integration.
In the guide above we exported using the default export settings, as next steps we recommend reading the following two articles.
Exporting Options Guide which covers the various export options.:
- Change granularity of the export. One document or one per book.
- Change the Export file format, for integrations which are file based like Dropbox and OneDrive.
- Change the Export Options page option
- Change the Kindle Annotation Types which are included.
- Change the sort order
- Change the Citation Style.
Integrations Settings Guide which covers the various settings for integrations:
- Connectting to an integration
- Disconnecting from an integration
- Changing the integration export settings
- Reseting the exported records.